Voice MCP
Enable voice conversations with Claude using any OpenAI-compatible STT/TTS service (voice-mcp.com)
 by mbailey
Docs & Usage Guide
Voice Mode
Install via:
uvx voice-mode|pip install voice-mode| getvoicemode.com
Natural voice conversations for AI assistants. Voice Mode brings human-like voice interactions to Claude Code, AI code editors through the Model Context Protocol (MCP).
🖥️ Compatibility
Runs on: Linux • macOS • Windows (WSL) • NixOS | Python: 3.10+
✨ Features
- 🎙️ Voice conversations with Claude - ask questions and hear responses
- 🔄 Multiple transports - local microphone or LiveKit room-based communication
- 🗣️ OpenAI-compatible - works with any STT/TTS service (local or cloud)
- ⚡ Real-time - low-latency voice interactions with automatic transport selection
- 🔧 MCP Integration - seamless with Claude Desktop and other MCP clients
- 🎯 Silence detection - automatically stops recording when you stop speaking (no more waiting!)
🎯 Simple Requirements
All you need to get started:
- 🎤 Computer with microphone and speakers OR ☁️ LiveKit server (LiveKit Cloud or self-hosted)
- 🔑 OpenAI API Key (optional) - Voice Mode can install free, open-source transcription and text-to-speech services locally
Quick Start
📖 Using a different tool? See our Integration Guides for Cursor, VS Code, Gemini CLI, and more!
Automatic Installation (Recommended)
Install Claude Code with Voice Mode configured and ready to run on Linux, macOS, and Windows WSL:
curl -O https://getvoicemode.com/install.sh && bash install.sh
This installer will:
- Install all system dependencies (Node.js, audio libraries, etc.)
- Install Claude Code if not already installed
- Configure Voice Mode as an MCP server
- Set up your system for voice conversations
After installation, just run:
# With OpenAI API (cloud-based, requires API key)
export OPENAI_API_KEY=your-openai-key
claude converse

# Or use free local services (Voice Mode will offer to install them)
claude converse
Manual Installation
For manual setup steps, see the Claude Code Integration Guide.
🎬 Demo
Watch Voice Mode in action with Claude Code:

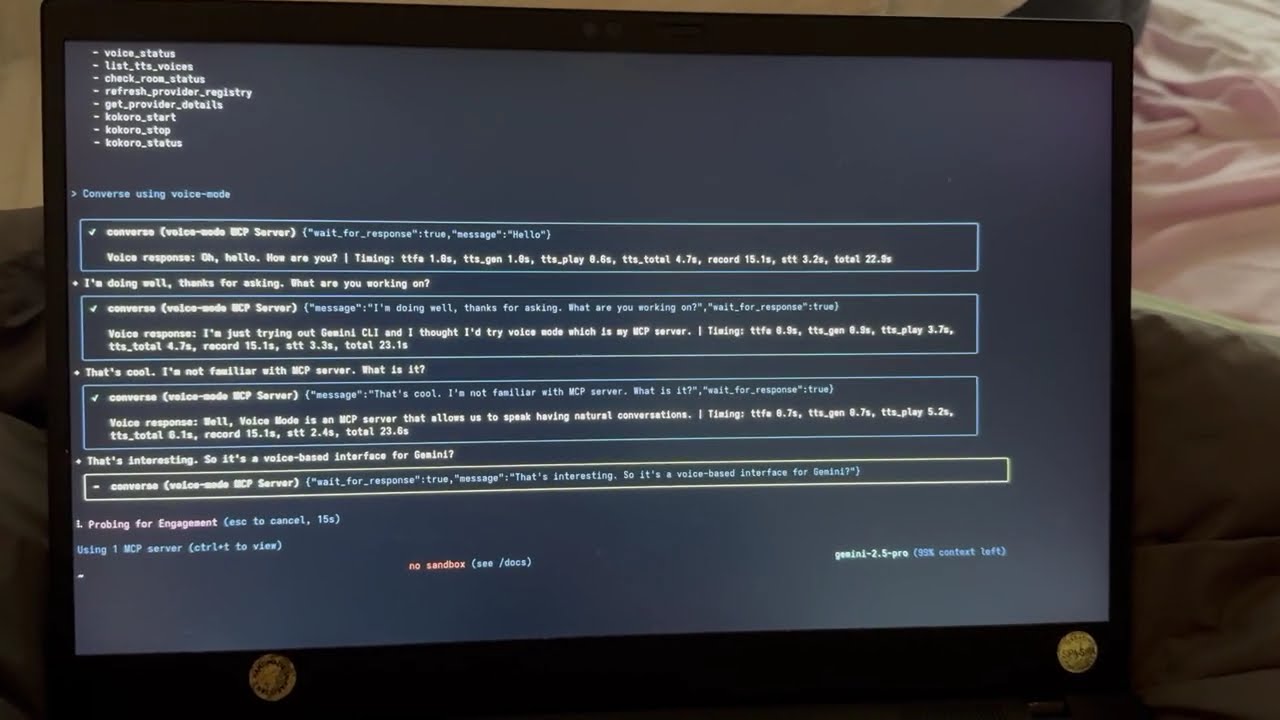
Voice Mode with Gemini CLI
See Voice Mode working with Google's Gemini CLI (their implementation of Claude Code):
Example Usage
Once configured, try these prompts with Claude:
👨💻 Programming & Development
"Let's debug this error together"- Explain the issue verbally, paste code, and discuss solutions"Walk me through this code"- Have Claude explain complex code while you ask questions"Let's brainstorm the architecture"- Design systems through natural conversation"Help me write tests for this function"- Describe requirements and iterate verbally
💡 General Productivity
"Let's do a daily standup"- Practice presentations or organize your thoughts"Interview me about [topic]"- Prepare for interviews with back-and-forth Q&A"Be my rubber duck"- Explain problems out loud to find solutions
🎯 Voice Control Features
"Read this error message"(Claude speaks, then waits for your response)"Just give me a quick summary"(Claude speaks without waiting)- Use
converse("message", wait_for_response=False)for one-way announcements
The converse function makes voice interactions natural - it automatically waits for your response by default, creating a real conversation flow.
Supported Tools
Voice Mode works with your favorite AI coding assistants:
- 🤖 Claude Code - Anthropic's official CLI
- 🖥️ Claude Desktop - Desktop application
- 🌟 Gemini CLI - Google's CLI tool
- ⚡ Cursor - AI-first code editor
- 💻 VS Code - With MCP preview support
- 🦘 Roo Code - AI dev team in VS Code
- 🔧 Cline - Autonomous coding agent
- ⚡ Zed - High-performance editor
- 🏄 Windsurf - Agentic IDE by Codeium
- 🔄 Continue - Open-source AI assistant
Installation
Prerequisites
- Python >= 3.10
- Astral UV - Package manager (install with
curl -LsSf https://astral.sh/uv/install.sh | sh) - OpenAI API Key (or compatible service)
System Dependencies
Ubuntu/Debian
sudo apt update
sudo apt install -y python3-dev libasound2-dev libasound2-plugins libportaudio2 portaudio19-dev ffmpeg pulseaudio pulseaudio-utils
Note for WSL2 users: WSL2 requires additional audio packages (pulseaudio, libasound2-plugins) for microphone access. See our WSL2 Microphone Access Guide if you encounter issues.
Fedora/RHEL
sudo dnf install python3-devel alsa-lib-devel portaudio-devel ffmpeg
macOS
# Install Homebrew if not already installed
/bin/bash -c "$(curl -fsSL https://raw.githubusercontent.com/Homebrew/install/HEAD/install.sh)"

# Install dependencies
brew install portaudio ffmpeg cmake
Windows (WSL)
Follow the Ubuntu/Debian instructions above within WSL.
NixOS
Voice Mode includes a flake.nix with all required dependencies. You can either:
- Use the development shell (temporary):
nix develop github:mbailey/voicemode
- Install system-wide (see Installation section below)
Quick Install
# Using Claude Code (recommended)
claude mcp add --scope user voice-mode uvx voice-mode

# Using Claude Code with Nix (NixOS)
claude mcp add voice-mode nix run github:mbailey/voicemode

# Using UV
uvx voice-mode

# Using pip
pip install voice-mode

# Using Nix (NixOS)
nix run github:mbailey/voicemode
Configuration for AI Coding Assistants
📖 Looking for detailed setup instructions? Check our comprehensive Integration Guides for step-by-step instructions for each tool!
Below are quick configuration snippets. For full installation and setup instructions, see the integration guides above.
Claude Code (CLI)
claude mcp add voice-mode -- uvx voice-mode
Or with environment variables:
claude mcp add voice-mode --env OPENAI_API_KEY=your-openai-key -- uvx voice-mode
Claude Desktop
macOS: ~/Library/Application Support/Claude/claude_desktop_config.json
Windows: %APPDATA%\Claude\claude_desktop_config.json
{
  "mcpServers": {
    "voice-mode": {
      "command": "uvx",
      "args": ["voice-mode"],
      "env": {
        "OPENAI_API_KEY": "your-openai-key"
      }
    }
  }
}
Cline
Add to your Cline MCP settings:
Windows:
{
  "mcpServers": {
    "voice-mode": {
      "command": "cmd",
      "args": ["/c", "uvx", "voice-mode"],
      "env": {
        "OPENAI_API_KEY": "your-openai-key"
      }
    }
  }
}
macOS/Linux:
{
  "mcpServers": {
    "voice-mode": {
      "command": "uvx",
      "args": ["voice-mode"],
      "env": {
        "OPENAI_API_KEY": "your-openai-key"
      }
    }
  }
}
Continue
Add to your .continue/config.json:
{
  "experimental": {
    "modelContextProtocolServers": [
      {
        "transport": {
          "type": "stdio",
          "command": "uvx",
          "args": ["voice-mode"],
          "env": {
            "OPENAI_API_KEY": "your-openai-key"
          }
        }
      }
    ]
  }
}
Cursor
Add to ~/.cursor/mcp.json:
{
  "mcpServers": {
    "voice-mode": {
      "command": "uvx",
      "args": ["voice-mode"],
      "env": {
        "OPENAI_API_KEY": "your-openai-key"
      }
    }
  }
}
VS Code
Add to your VS Code MCP config:
{
  "mcpServers": {
    "voice-mode": {
      "command": "uvx",
      "args": ["voice-mode"],
      "env": {
        "OPENAI_API_KEY": "your-openai-key"
      }
    }
  }
}
Windsurf
{
  "mcpServers": {
    "voice-mode": {
      "command": "uvx",
      "args": ["voice-mode"],
      "env": {
        "OPENAI_API_KEY": "your-openai-key"
      }
    }
  }
}
Zed
Add to your Zed settings.json:
{
  "context_servers": {
    "voice-mode": {
      "command": {
        "path": "uvx",
        "args": ["voice-mode"],
        "env": {
          "OPENAI_API_KEY": "your-openai-key"
        }
      }
    }
  }
}
Roo Code
- Open VS Code Settings (
Ctrl/Cmd + ,) - Search for "roo" in the settings search bar
- Find "Roo-veterinaryinc.roo-cline → settings → Mcp_settings.json"
- Click "Edit in settings.json"
- Add Voice Mode configuration:
{
  "mcpServers": {
    "voice-mode": {
      "command": "uvx",
      "args": ["voice-mode"],
      "env": {
        "OPENAI_API_KEY": "your-openai-key"
      }
    }
  }
}
Alternative Installation Options
Using Docker
docker run -it --rm \
  -e OPENAI_API_KEY=your-openai-key \
  --device /dev/snd \
  -v /tmp/.X11-unix:/tmp/.X11-unix \
  -e DISPLAY=$DISPLAY \
  ghcr.io/mbailey/voicemode:latest
Using pipx
pipx install voice-mode
From source
git clone https://github.com/mbailey/voicemode.git
cd voicemode
pip install -e .
NixOS Installation Options
1. Install with nix profile (user-wide):
nix profile install github:mbailey/voicemode
2. Add to NixOS configuration (system-wide):
# In /etc/nixos/configuration.nix
environment.systemPackages = [
  (builtins.getFlake "github:mbailey/voicemode").packages.${pkgs.system}.default
];
3. Add to home-manager:
# In home-manager configuration
home.packages = [
  (builtins.getFlake "github:mbailey/voicemode").packages.${pkgs.system}.default
];
4. Run without installing:
nix run github:mbailey/voicemode
Tools
| Tool | Description | Key Parameters |
|---|---|---|
converse |
Have a voice conversation - speak and optionally listen | message, wait_for_response (default: true), listen_duration (default: 30s), transport (auto/local/livekit) |
listen_for_speech |
Listen for speech and convert to text | duration (default: 5s) |
check_room_status |
Check LiveKit room status and participants | None |
check_audio_devices |
List available audio input/output devices | None |
start_kokoro |
Start the Kokoro TTS service | models_dir (optional, defaults to ~/Models/kokoro) |
stop_kokoro |
Stop the Kokoro TTS service | None |
kokoro_status |
Check the status of Kokoro TTS service | None |
install_whisper_cpp |
Install whisper.cpp for local STT | install_dir, model (default: base.en), use_gpu (auto-detect) |
install_kokoro_fastapi |
Install kokoro-fastapi for local TTS | install_dir, port (default: 8880), auto_start (default: true) |
Note: The converse tool is the primary interface for voice interactions, combining speaking and listening in a natural flow.
New: The install_whisper_cpp and install_kokoro_fastapi tools help you set up free, private, open-source voice services locally. See Installation Tools Documentation for detailed usage.
Configuration
- 📖 Integration Guides - Step-by-step setup for each tool
- 🔧 Configuration Reference - All environment variables
- 📁 Config Examples - Ready-to-use configuration files
Quick Setup
The only required configuration is your OpenAI API key:
export OPENAI_API_KEY="your-key"
Optional Settings
# Custom STT/TTS services (OpenAI-compatible)
export STT_BASE_URL="http://127.0.0.1:2022/v1"  # Local Whisper
export TTS_BASE_URL="http://127.0.0.1:8880/v1"  # Local TTS
export TTS_VOICE="alloy"                        # Voice selection

# Or use voice preference files (see Configuration docs)
# Project: /your-project/voices.txt or /your-project/.voicemode/voices.txt
# User: ~/voices.txt or ~/.voicemode/voices.txt

# LiveKit (for room-based communication)
# See docs/livekit/ for setup guide
export LIVEKIT_URL="wss://your-app.livekit.cloud"
export LIVEKIT_API_KEY="your-api-key"
export LIVEKIT_API_SECRET="your-api-secret"

# Debug mode
export VOICEMODE_DEBUG="true"

# Save all audio (TTS output and STT input)
export VOICEMODE_SAVE_AUDIO="true"

# Audio format configuration (default: pcm)
export VOICEMODE_AUDIO_FORMAT="pcm"         # Options: pcm, mp3, wav, flac, aac, opus
export VOICEMODE_TTS_AUDIO_FORMAT="pcm"     # Override for TTS only (default: pcm)
export VOICEMODE_STT_AUDIO_FORMAT="mp3"     # Override for STT upload

# Format-specific quality settings
export VOICEMODE_OPUS_BITRATE="32000"       # Opus bitrate (default: 32kbps)
export VOICEMODE_MP3_BITRATE="64k"          # MP3 bitrate (default: 64k)
Audio Format Configuration
Voice Mode uses PCM audio format by default for TTS streaming for optimal real-time performance:
- PCM (default for TTS): Zero latency, best streaming performance, uncompressed
- MP3: Wide compatibility, good compression for uploads
- WAV: Uncompressed, good for local processing
- FLAC: Lossless compression, good for archival
- AAC: Good compression, Apple ecosystem
- Opus: Small files but NOT recommended for streaming (quality issues)
The audio format is automatically validated against provider capabilities and will fallback to a supported format if needed.
Local STT/TTS Services
For privacy-focused or offline usage, Voice Mode supports local speech services:
- Whisper.cpp - Local speech-to-text with OpenAI-compatible API
- Kokoro - Local text-to-speech with multiple voice options
These services provide the same API interface as OpenAI, allowing seamless switching between cloud and local processing.
OpenAI API Compatibility Benefits
By strictly adhering to OpenAI's API standard, Voice Mode enables powerful deployment flexibility:
- 🔀 Transparent Routing: Users can implement their own API proxies or gateways outside of Voice Mode to route requests to different providers based on custom logic (cost, latency, availability, etc.)
- 🎯 Model Selection: Deploy routing layers that select optimal models per request without modifying Voice Mode configuration
- 💰 Cost Optimization: Build intelligent routers that balance between expensive cloud APIs and free local models
- 🔧 No Lock-in: Switch providers by simply changing the
BASE_URL- no code changes required
Example: Simply set OPENAI_BASE_URL to point to your custom router:
export OPENAI_BASE_URL="https://router.example.com/v1"
export OPENAI_API_KEY="your-key"
# Voice Mode now uses your router for all OpenAI API calls
The OpenAI SDK handles this automatically - no Voice Mode configuration needed!
Architecture
┌─────────────────────┐     ┌──────────────────┐     ┌─────────────────────┐
│   Claude/LLM        │     │  LiveKit Server  │     │  Voice Frontend     │
│   (MCP Client)      │◄────►│  (Optional)     │◄───►│  (Optional)         │
└─────────────────────┘     └──────────────────┘     └─────────────────────┘
         │                            │
         │                            │
         ▼                            ▼
┌─────────────────────┐     ┌──────────────────┐
│  Voice MCP Server   │     │   Audio Services │
│  • converse         │     │  • OpenAI APIs   │
│  • listen_for_speech│◄───►│  • Local Whisper │
│  • check_room_status│     │  • Local TTS     │
│  • check_audio_devices    └──────────────────┘
└─────────────────────┘
Troubleshooting
Common Issues
- No microphone access: Check system permissions for terminal/application
- WSL2 Users: See WSL2 Microphone Access Guide
- UV not found: Install with
curl -LsSf https://astral.sh/uv/install.sh | sh - OpenAI API error: Verify your
OPENAI_API_KEYis set correctly - No audio output: Check system audio settings and available devices
Debug Mode
Enable detailed logging and audio file saving:
export VOICEMODE_DEBUG=true
Debug audio files are saved to: ~/voicemode_recordings/
Audio Diagnostics
Run the diagnostic script to check your audio setup:
python scripts/diagnose-wsl-audio.py
This will check for required packages, audio services, and provide specific recommendations.
Audio Saving
To save all audio files (both TTS output and STT input):
export VOICEMODE_SAVE_AUDIO=true
Audio files are saved to: ~/voicemode_audio/ with timestamps in the filename.
Documentation
📚 Read the full documentation at voice-mode.readthedocs.io
Getting Started
- Integration Guides - Step-by-step setup for all supported tools
- Configuration Guide - Complete environment variable reference
Development
- Using uv/uvx - Package management with uv and uvx
- Local Development - Development setup guide
- Audio Formats - Audio format configuration and migration
- Statistics Dashboard - Performance monitoring and metrics
Service Guides
- Whisper.cpp Setup - Local speech-to-text configuration
- Kokoro Setup - Local text-to-speech configuration
- Service Health Checks - Service readiness and health monitoring
- LiveKit Integration - Real-time voice communication
Troubleshooting
- WSL2 Microphone Access - WSL2 audio setup
- Migration Guide - Upgrading from older versions
Links
- Website: getvoicemode.com
- Documentation: voice-mode.readthedocs.io
- GitHub: github.com/mbailey/voicemode
- PyPI: pypi.org/project/voice-mode
- npm: npmjs.com/package/voicemode
Community
- Discord: Join our community
- Twitter/X: @getvoicemode
- YouTube: @getvoicemode
See Also
- 🚀 Integration Guides - Setup instructions for all supported tools
- 🔧 Configuration Reference - Environment variables and options
- 🎤 Local Services Setup - Run TTS/STT locally for privacy
- 🐛 Troubleshooting - Common issues and solutions
License
MIT - A Failmode Project
Similar Cursor MCP Servers You Might Like
Explore more hand-picked MCP servers that work great with Cursor IDE


